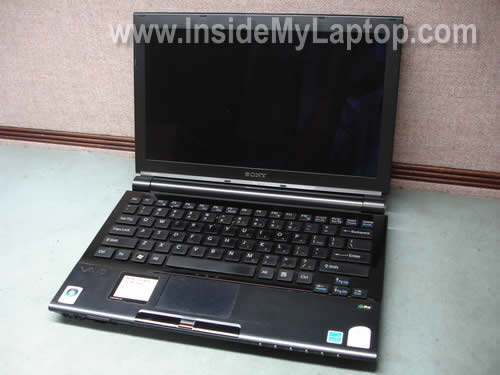
In this guide I explain how to disassemble Sony Vaio TZ series laptops in order to remove and replace the hard drive. As an example I took a Sony Vaio TZ130N laptop (Model: PCG-4L3L). In this little laptop the hard drive is buried deep inside the case and we’ll have to disassemble the whole thing apart.
I assume that my guide will work for the entire Sony Vaio TZ line of laptops. If it works for you, please mention the model number in the comments below.
Do not forget to turn off the laptop and remove the battery. Work in static-free environment.
STEP 1.
Remove the memory cover from the bottom.
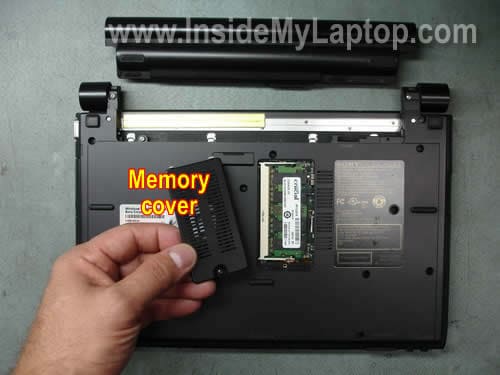
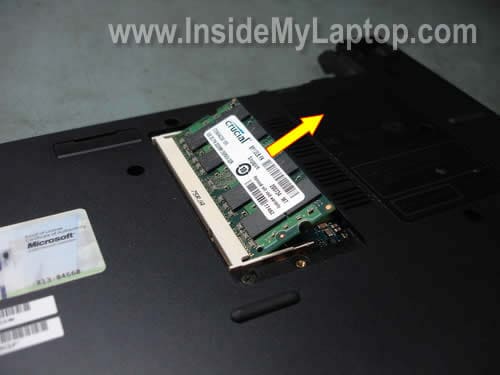
Pull the memory module from the slot.
You don’t have to remove the memory module in order to access and replace the hard drive. I’m doing that just to show where you can find the memory module.
STEP 2.
Remove all marked screws from the bottom of the laptop.
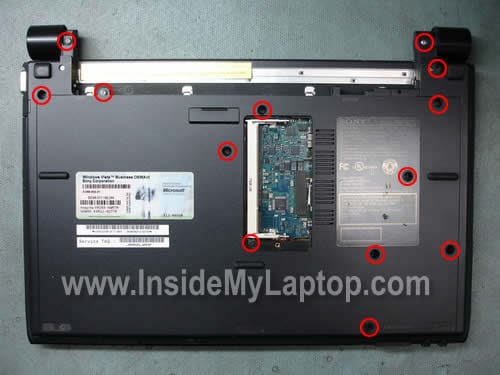
There are three more screws hidden under three rubber seals.
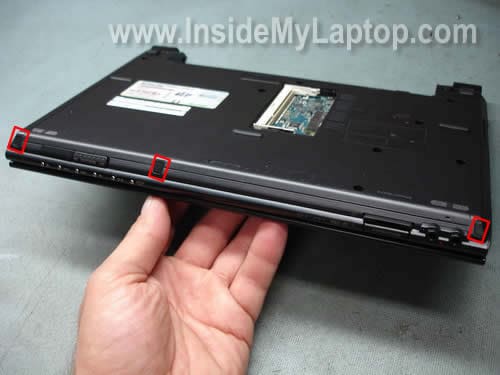
You can remove these rubber seals with a sharp object. Remove all three screws found under the seals.
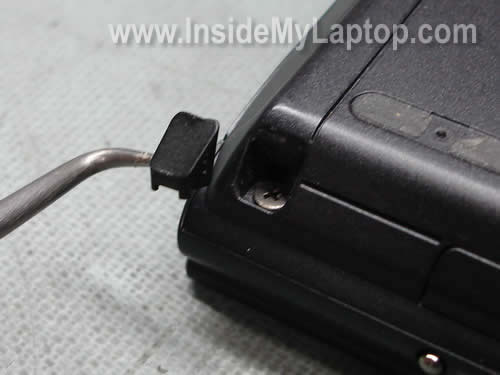
Remove one more screw found under the square rubber seal located close to the hinge.
STEP 3.
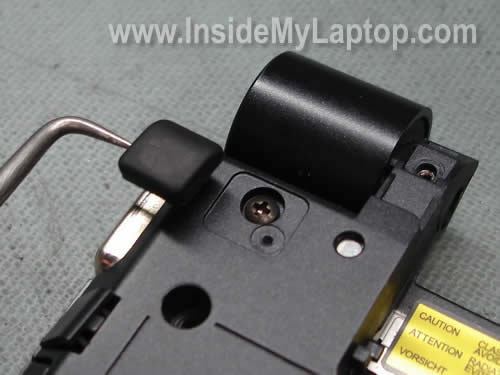
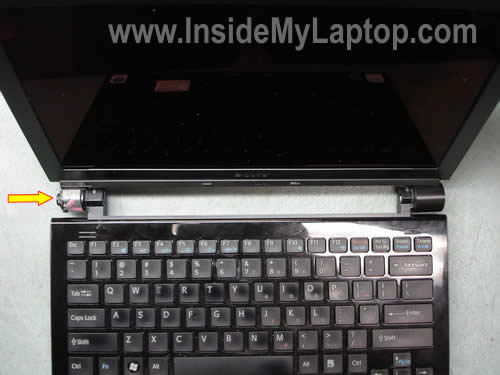
Very carefully remove the plastic cover from the left hinge. It’s not easy. I spent about 5 minutes trying to figure out how to remove the cover. It has a couple of plastic latches inside and you can remove it using a small flat head screwdriver.
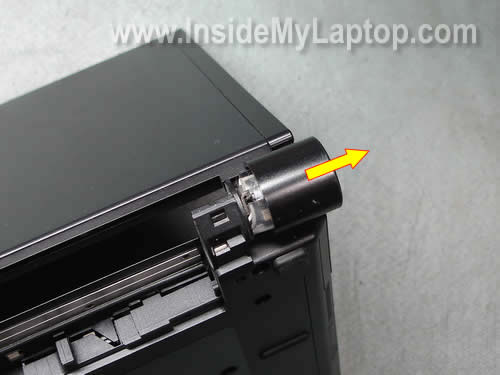
The cover has been removed.

Fortunately, you have to remove only one cover from the left hinge. This cover protects the power jack.
STEP 4.
If you have any SD card or cover inside the slot on the front of the laptop, remove both of them.

Start separating the top cover (keyboard) assembly as it shown on the picture below.
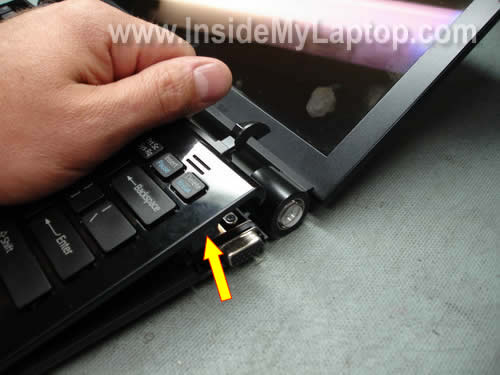
Work with your fingers until the top cover separated from the base.
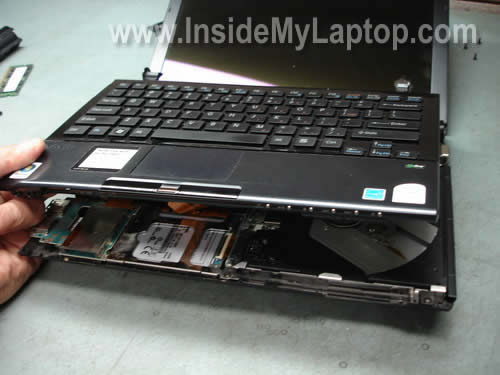
Place the top cover (keyboard) assembly upside down on the palm rest and disconnect the cable from the motherboard.
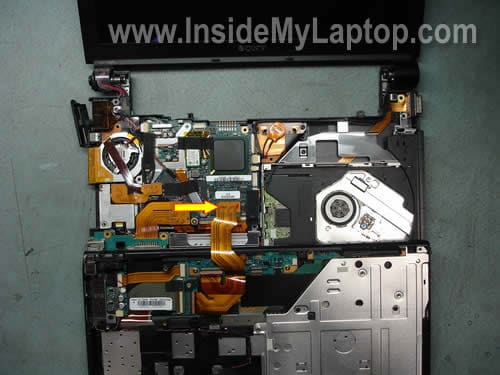
Remove the top cover (keyboard) assembly.
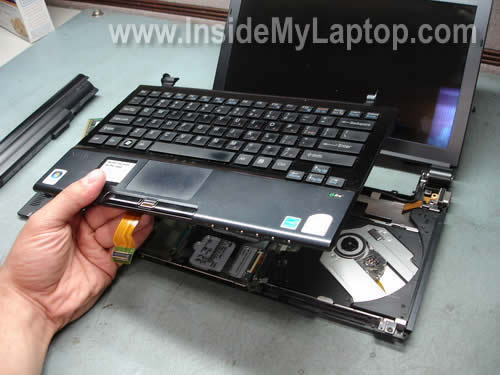
STEP 5.
You cannot access the hard drive until you remove the SD slot/USB board.
Remove two screws securing the board and unplug the cable from the motherboard.
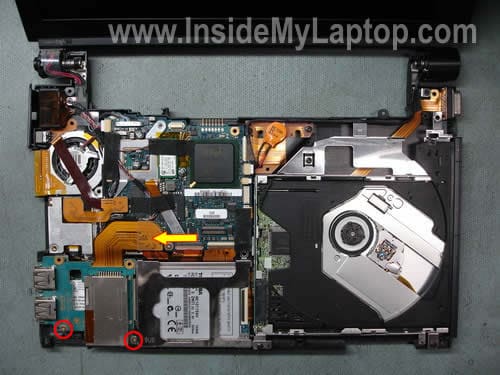
Lift up and remove the SD slot/USB board.
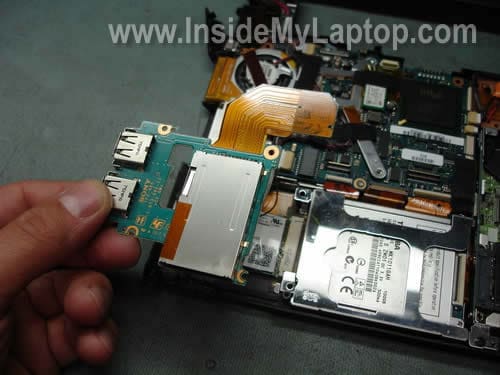
STEP 6.
The hard drive is mounted under the metal bracket. Remove one screw securing the hard drive bracket.

Remove the hard drive bracket.
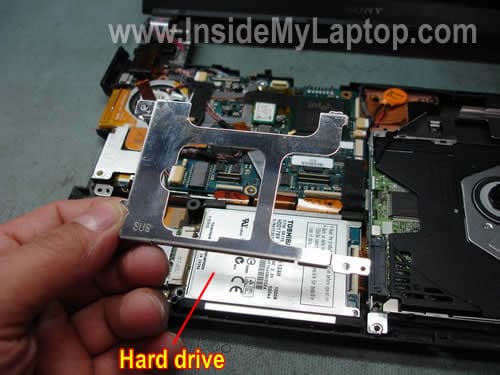
Lift up the hard drive and disconnect the hard drive cable.
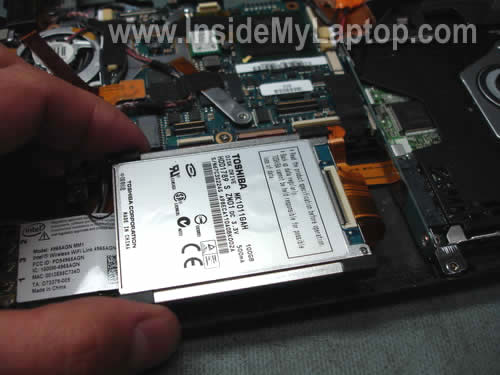
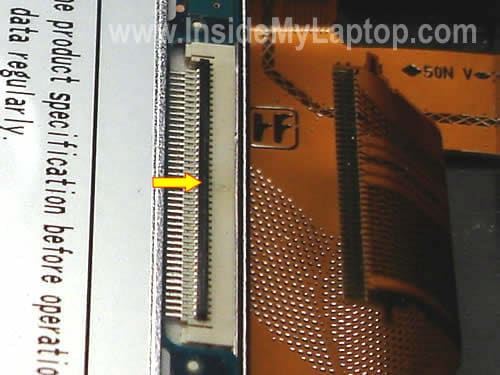
In order to release the cable you’ll have to unlock the connector first. Very carefully lift up the black piece on the connector. Pull the cable from the connector.
The hard drive has been removed. If you are replacing the hard drive, you’ll have to transfer four rubber corners to a new drive.
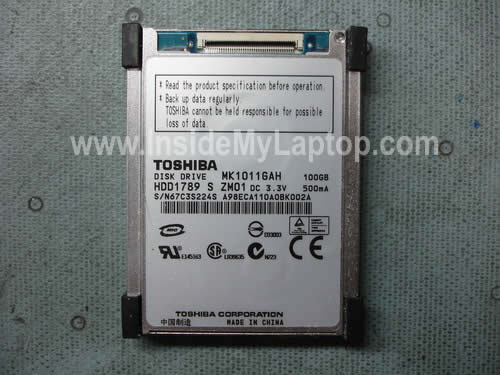
My Sony Vaio TZ130N laptop had a Toshiba 1.8″ 100GB hard drive (MK1011GAH) installed. It’s same type of hard drives found in iPods. These 1.8″ hard drives are not cheap but you can find them relatively inexpensive here.


0 komentar:
Posting Komentar